Virtual probe example#
This example illustrates how to use a virtual probe. It supports spherical mapping and equirectangular mapping. It is a useful feature when the input source is incompatible with the projection surface. We will demonstrate, in the following example, how it can be used to create a spherical or equirectangular projection from a cubemap. Below is the cubemap image that will be displayed in the dome.
Probe cubemap image#
As with the previous example, the pipeline is as follows:
create a low definition 3D model of the projection surface, used for calibration,
export from Blender a draft configuration file,
open the file in Splash, calibrate the video-projectors using the color-map,
create a high definition 3D model of the projection surface, used for projection,
replace the low definition 3D model with the high definition one,
In the Blender configuration file, replace the Image by the probe setup
load the cubemap image to the projection surface
Since the workflow repeats the same steps as the previous example, this example will continue where the previous demonstration left off, that is, after loading the high definition mesh into Splash. Save this configuration with Ctrl + s.
Create a 3D model of the cubemap and update the Node tree#
We will start from the previous Blender configuration file. The Image node is now replaced by a Probe node. An Object node is connected to the probe. This object receives as input an Image node (this image is rendered under a cubemap projection) and a Mesh node associated to a cube mesh. Below is the final node tree:
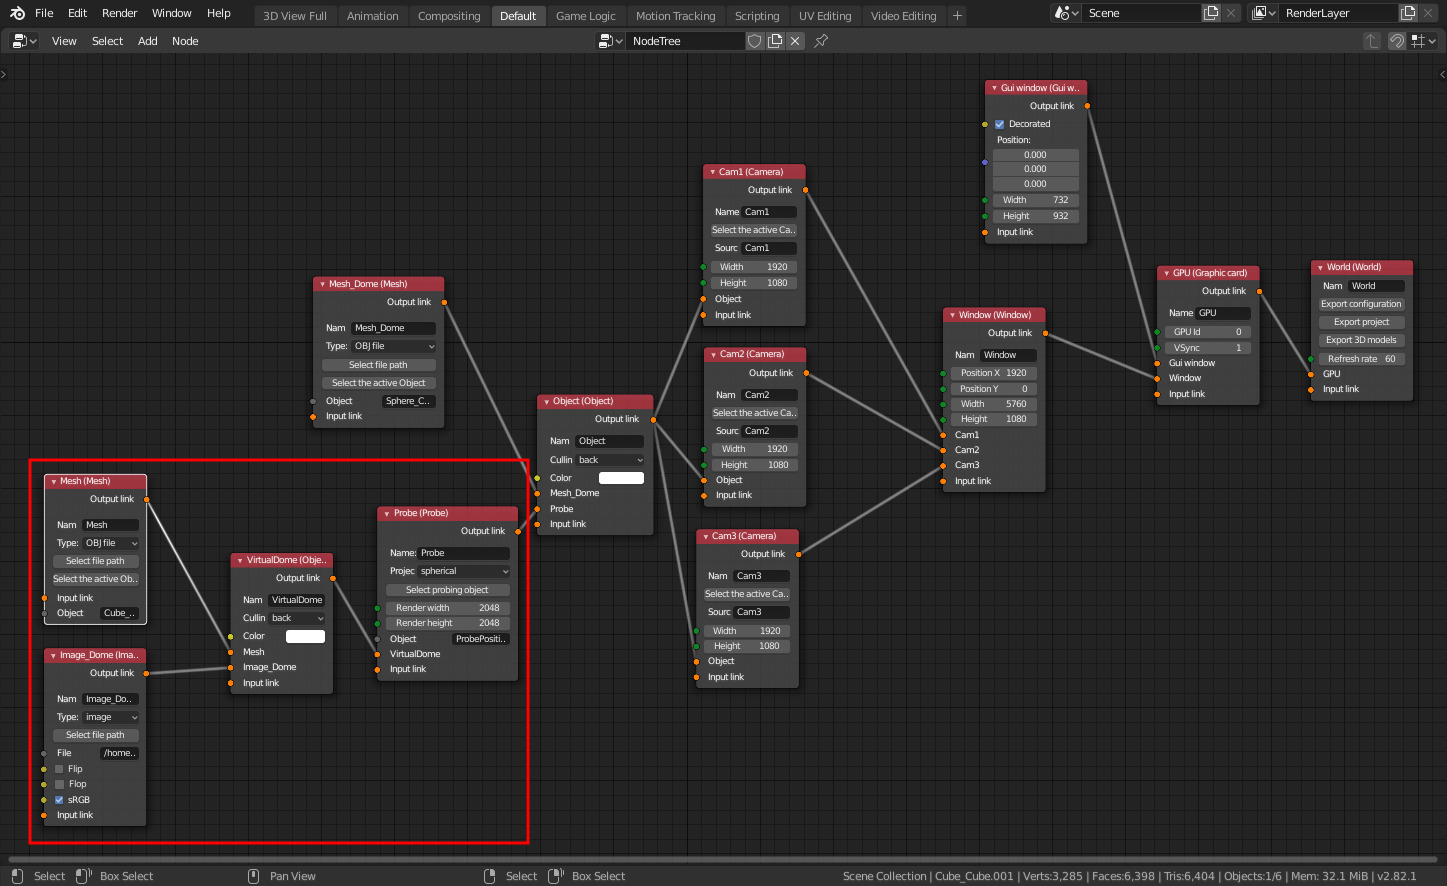
Probe Blender tree#
Notice that the probe projection is set to spherical and the render width and height is 2048x2048 in our case. The cubemap object node has back culling since we are “virtually” projecting inside a cube. Attention must be taken when generating the cube uvs. The texture coordinate must be coherent with the received image cubemap. If necessary, reorder/scale Blender’s “UV island”.

Probe Blender uvs#
Splash configuration can be exported via the “Export configuration” button of the World node. The 3D models must be exported as well. Make sure to save this configuration file with a different name than the calibrated configuration file from the previous example.
Load the new configuration in Splash#
Load the configuration file from the command line:
splash probe_config.json
Two windows will appear, one borderless and another one which will show the GUI when pressing Ctrl + Tab. The cameras of this configuration files are not calibrated. We will copy the cameras positions and orientations from the previous example. In the File menu, select ‘Copy calibration from configuration’, then select the file from which to copy the configuration.
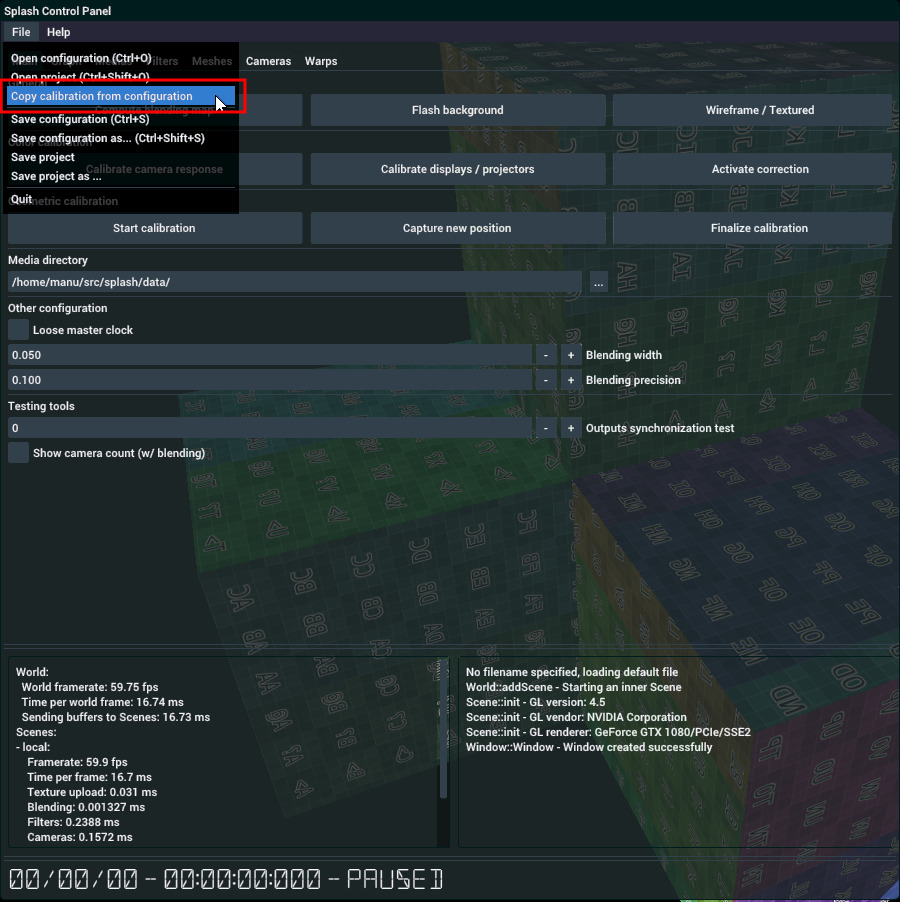
Probe copy configuration#
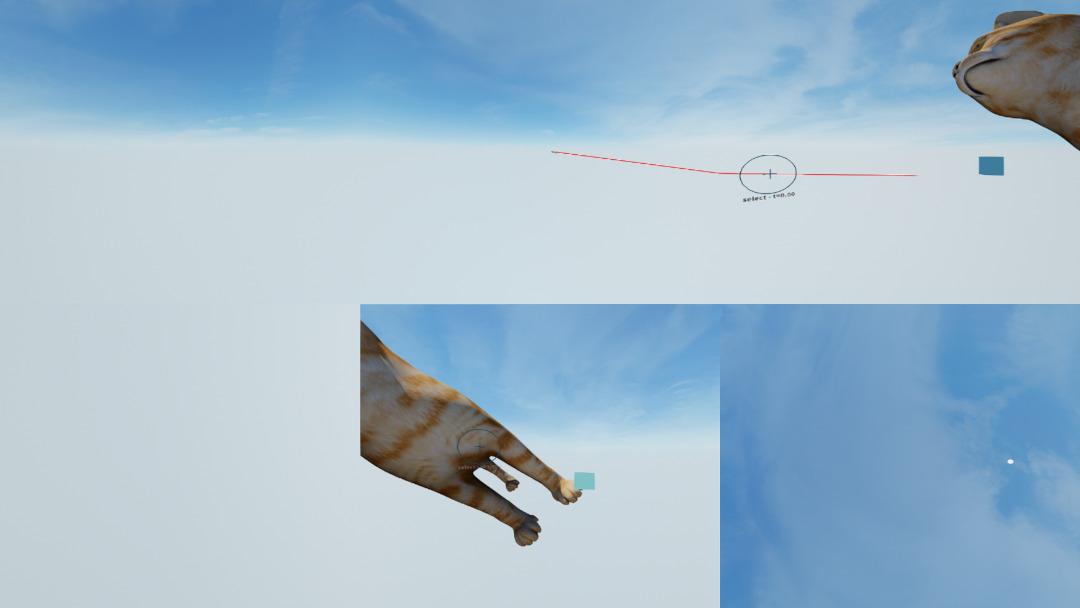
The cameras parameters, as well as the warp if any, are now transferred to the current configuration file (probe_config.json). The setup is now completed. You should see an image with spherical mapping.
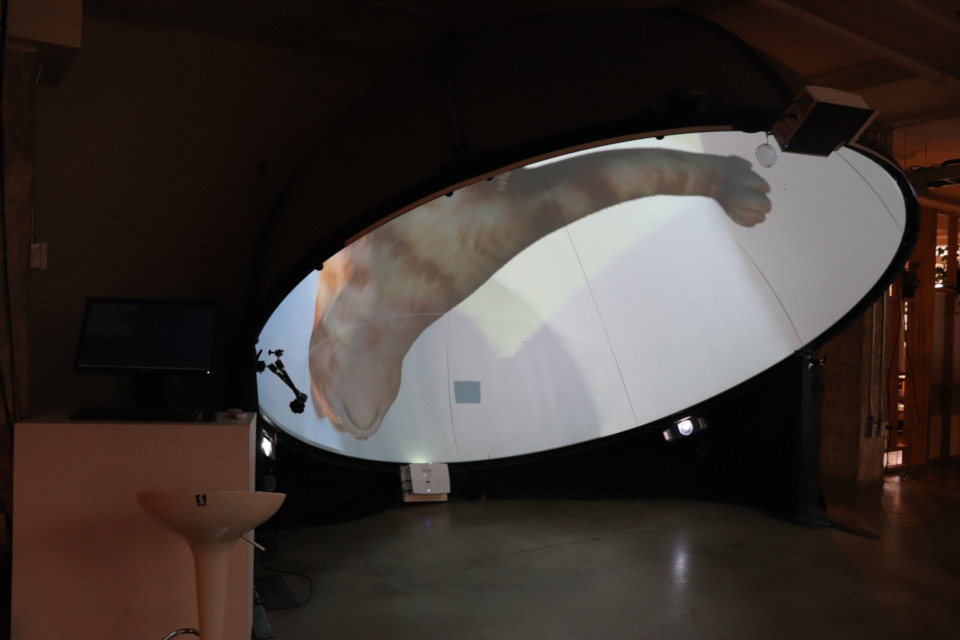
Probe Sphere Mapping#