Calibration#
This section covers topics about the calibration process.
Geometrical calibration#
This is a (very) preliminary guide to projector calibration in Splash, feel free to report any error or useful addition.
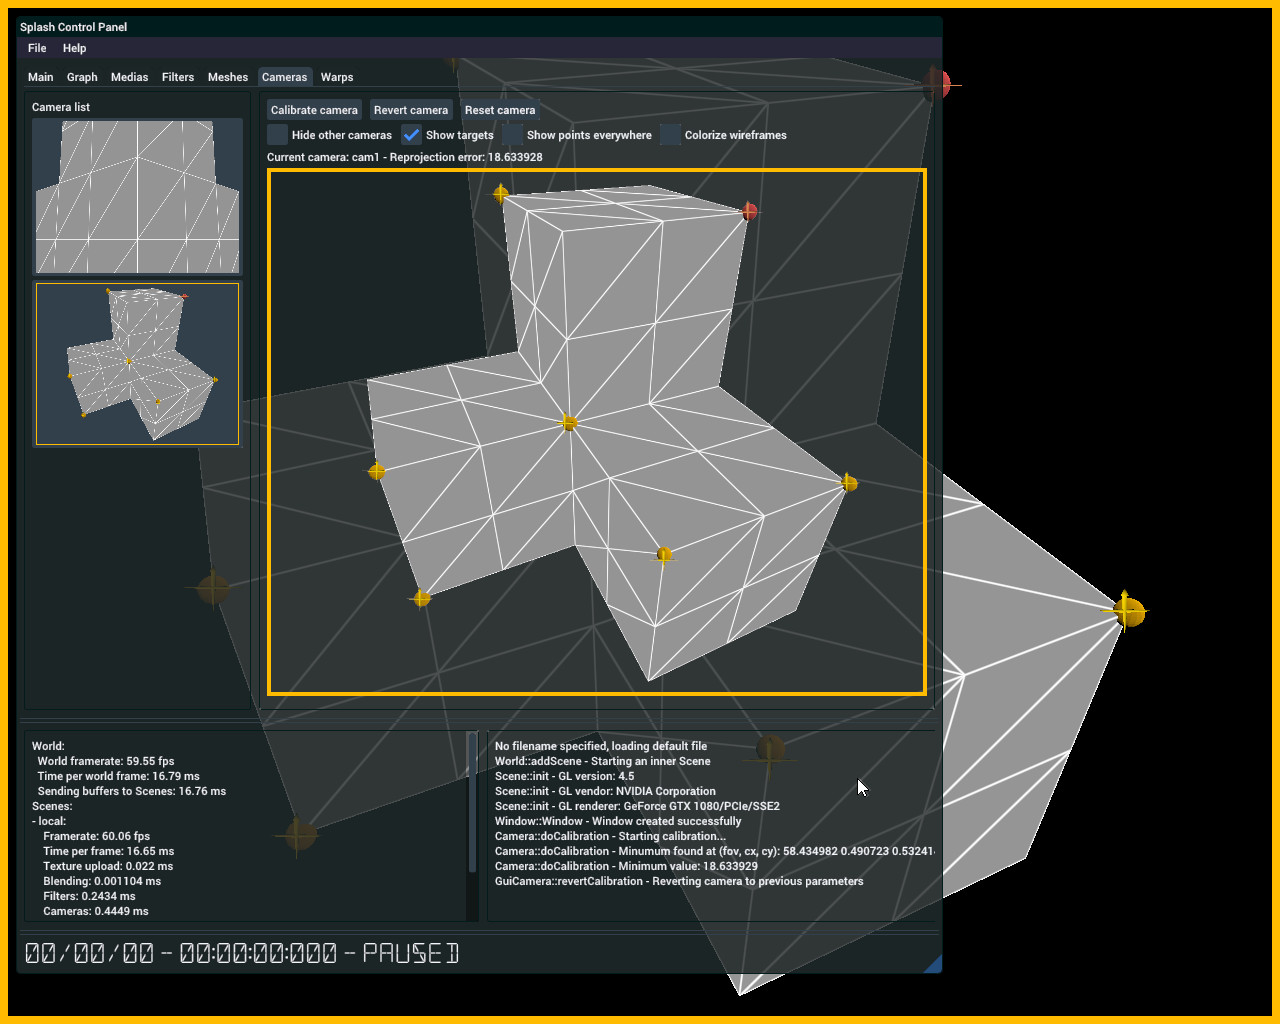
The way calibration works in Splash is to reproduce as closely as possible the parameters of the physical projectors onto a virtual camera. This includes its intrinsic parameters (field of view, shifts) as well as its extrinsic parameters (position and orientation). Roughly, to find these parameters we will set a few point - pixel pairs (at least six of them) and then ask Splash to find values which minimizes the squared sum of the differences between point projections and the associated pixel position.
Once the configuration file is set and each videoprojector has an output, do the following on the screen which has the GUI:
Press Ctrl + ‘Tab’ to make the GUI appear,
open the Cameras tabulation
select the camera to calibrate by clicking in the camera list on the left,
press Ctrl + ‘W’ to switch the view to wireframe,
left click on a vertex to select it,
Shift + left click to specify the position where this vertex should be projected. You can move this projection with the arrow keys,
to delete an erroneous point, Ctrl + left click on it,
continue until you have seven pairs of point - projection. You can orientate the view with the mouse (right click + drag) and zoom in / out with the wheel,
press ‘C’ to ask for calibration.

Geometrical calibration#
At this point, you should have a first calibration. Pressing ‘C’ multiple times can help getting a better one, as is adding more pairs of points - projection. You can go back to previous calibration by pressing Ctrl + ‘Z’ (still while hovering the camera view).
Once you are happy with the result, you can go back to textured rendering by pressing Ctrl + ‘T’ and save the configuration by pressing Ctrl + ‘S’. It is advised to save after each calibrated camera (you never know…). Also, be aware that the calibration points are saved, so you will be able to update them after reloading the project. They are not dependent of the 3D model, so you can for example calibrate with a simple model, then change it for a high resolution model of the projection surface.
Projection warping#
For these cases where you 3D model does not exactly match the projection surface (lack of proper physical measures, inflatable dome, plans do not match the real surface…), you can use projection warping to correct these last few spots where the projectors do not match. It is meant to be used as a last resort tool, as it will by definition produce a deformed output.
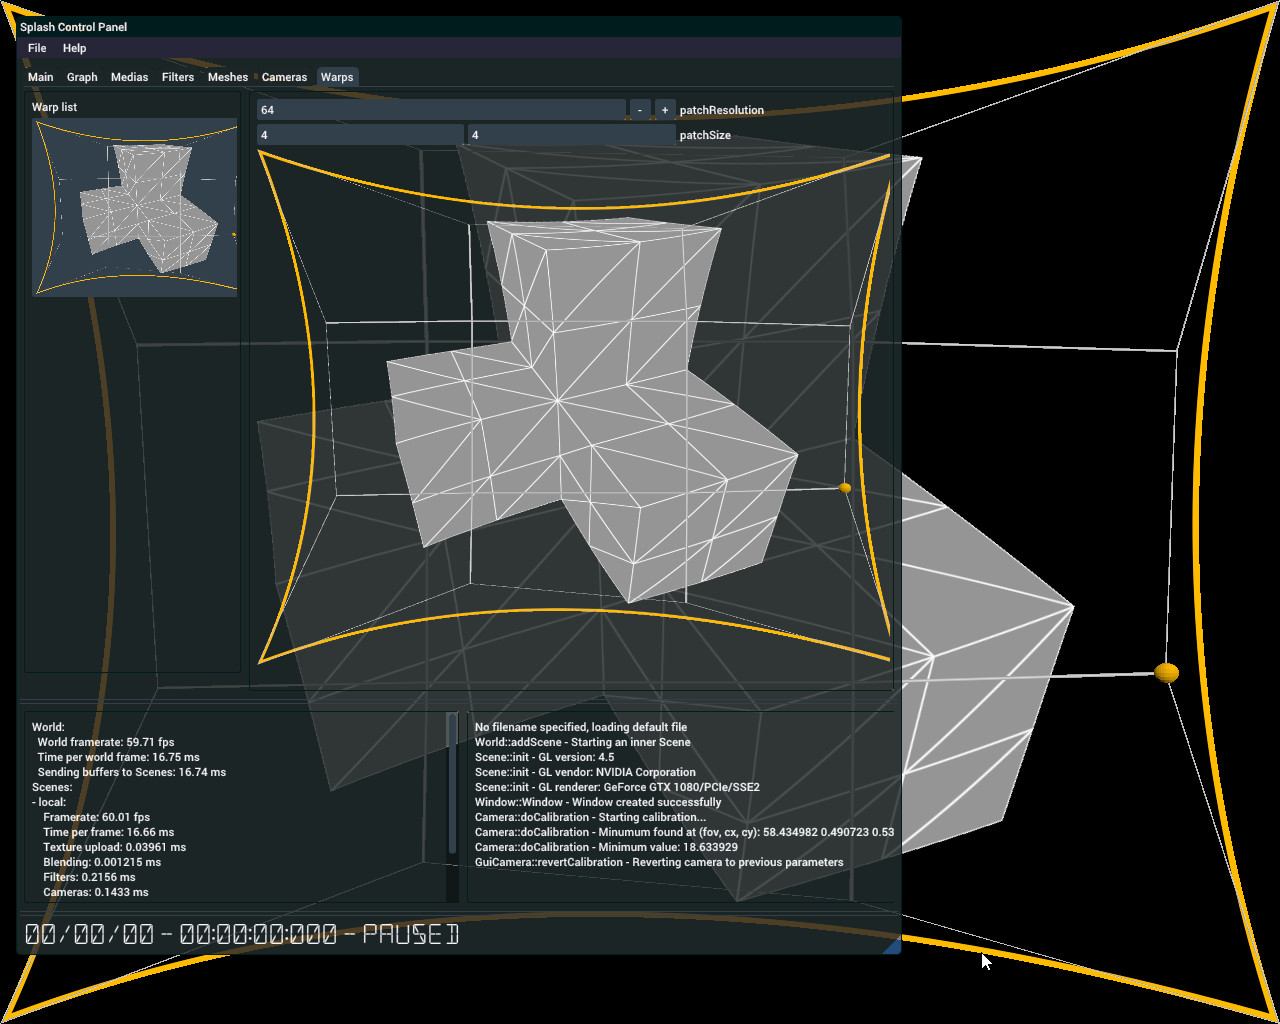
Projection warping allows for projection deformation according to a set of control points, from which a Bezier patch is computed. The result is a continuous deformation which can help making two projections match.
The user interface to control warping is similar to the camera calibration interface:
Press Ctrl + ‘Tab’ to open the GUI,
open the Warps tabulation,
select the projection you want to warp by clicking in the projection list on the left,
a grid appears on the desired projection: while still in the GUI, you can move the control points (the vertices of the grid),
when satisfied, close the Warps tabulation to make the grid disappear.

Projection warping#
Color calibration#
Note: color calibration is still experimental
Color calibration is done by capturing (automatically) a bunch of photographs of the projected surface, so as to compute a common color and luminance space for all the videoprojectors. Note that Splash must have been compiled with GPhoto support for color calibration to be available. Also, color calibration does not need any geometric calibration to be done yet, although it would not make much sense to have color calibration without geometric calibration.
Connect a PTP-compatible camera to the computer. The list of compatible cameras can be found there.
Set the camera in manual mode, chose sensitivity (the lower the better regarding noise) and the aperture (between 1/5.6 and 1/8 to reduce vignetting). Disable the autofocus mode and set the focus on the projection surface manually.
Open the GUI by pressing Ctrl + ‘Tab’.
Go to the Graph tabulation, find the “colorCalibrator” object in the list.
Set the various options, default values are a good start:
colorSamples is the number of samples taken for each channel of each projector,
detectionThresholdFactor has an effect on the detection of the position of each projector,
equalizeMethod gives the choice between various color balance equalization methods:
0: select a mean color balance of all projectors base balance,
1: select the color balance of the weakest projector,
2: select the color balance which would give the highest global luminance,
imagePerHDR sets the number of shots to create the HDR images on which color values will be measured,
hdrStep sets the stops between two shots to create an HDR image.
Press Ctrl + ‘O’ or click on “Calibrate camera response” in the Main tabulation, to calibrate the camera color response,
Press Ctrl + ‘P’ or click on “Calibrate displays / projectors” to launch the projector calibration.
Once done, calibration is automatically activated. It can be turned off by pressing Ctrl + ‘L’ or by clicking on “Activate correction”. If the process went well, the luminance and color balance of the projectors should match more closely. If not, there are a few things to play with:
Projector detection could have gone wrong. Check in the logs (in the console) that the detected positions make sense. If not, increase or decrease the detectionThresholdFactor and retry.
The dynamic range of the projectors could be too wide. If so you would notice in the logs that there seem to be a maximum clamping value in the HDR measurements. If so, increase the imagePerHDR value.
While playing with the values, do not hesitate to lower the colorSamples to reduce the calibration time. Once everything seems to run, increase it again to do the final calibration.
Also, do not forget to save the calibration once you are happy with the results!
Blending#
The blending algorithm uses vertex attributes to store the blending attributes. An OpenGL context version of at least 4.3 activates the vertex blending, otherwise no blending is available.
To activate the blending, and as long as calibration is done correctly, one only has to press Ctrl + ‘B’. Pressing Ctrl + Alt + ‘B’ will recalculate the blending at each frame (meaning that it can handle moving objects!).
Vertex blending has some known issues, most of which can be handled by tweaking the blending parameters of the cameras: blendWidth and blendPrecision. To find the best values, activate blending with Ctrl + Alt + ‘B’, tune the parameters, and check the result.