First steps with Splash#
This tutorial is about getting started with Splash for a single video projector, projecting onto a wall corner. Our current goal is to get more familiar with Splash by doing a demo of its main features.
Requirements#
a computer
a video projector
a recent version of Splash installed on your computer
Find a wall corner to project onto#
For this tutorial, we will use a wall corner to demonstrate Splash calibration features.
Find one in your home or at work. We need two adjacent walls at a 90 degrees angle, without floor and ceiling.
Open Splash#
Open Splash, either by double-clicking on its icon, or by calling it from the command line:
splash
You should have two windows open on your computer: the GUI window and the projection one.
Notice that the default model featured is a wall corner.
Connect the videoprojector to the computer#
If your projector was not switched on, or if it was not connected to the computer, now is a good time to connect it and to switch it on.
You might need to adjust the focus setting on the projector to have a crisp image when projecting.
Assign windows to displays (monitor and projector)#
With Splash open and a connected, switched on projector, check that the projection window in Splash is displayed by the projector, and that the GUI window is displayed on your computer monitor.
If that is not the case:
Move the GUI window to your computer monitor: you can drag it onto the monitor by clicking on its title bar.
Move the projection window to the projector by dragging: on Ubuntu, click inside the projection window while pressing the
Superkey, enabling you to move the window to the projection area.
The projection window should completely fill the screen. You might have
to adjust the display resolution of your projector to match the one in
Splash; if you are on Ubuntu, the projectors settings are accessed in
the Screens tab of the Settings. Note that the resolution of the
default wall corner 3D model is 1280x720.
In our lab, we now have the current setup:
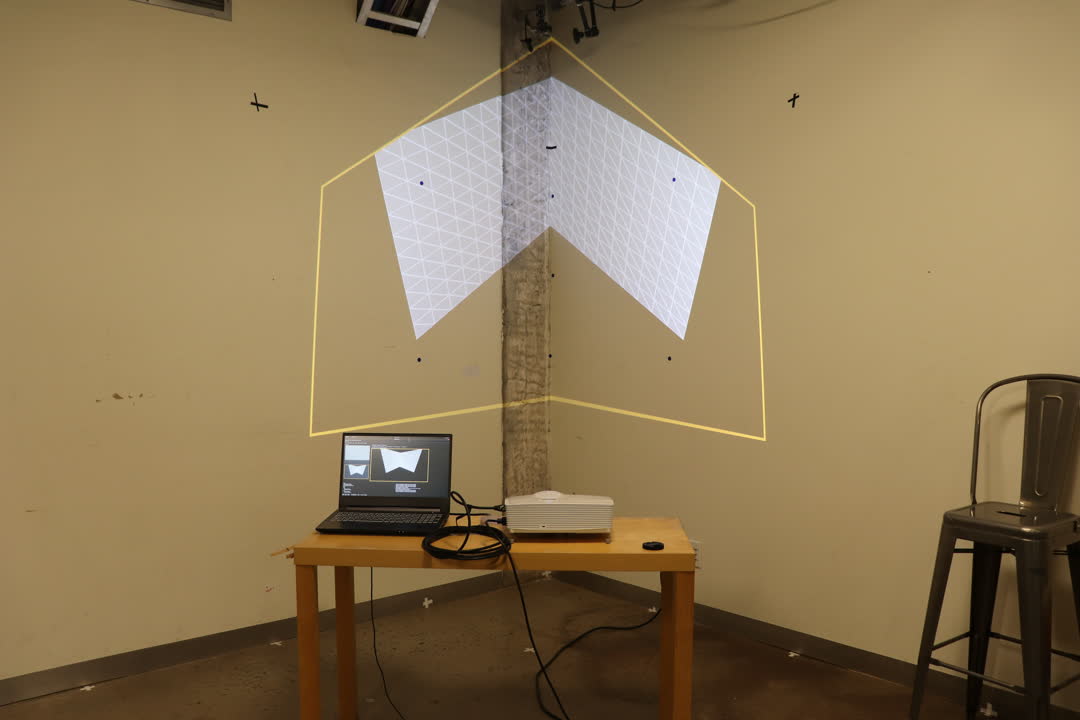
On a bench, there is the computer with a projector in front of a wall corner. On the computer monitor, we can see the Splash GUI window displayed, and the projector displays the 3D model with the default color map onto the wall corner.#
Notice that the 3D model image is not adjusted to the wall corner. This is our next step.
Set up calibration points#
We are ready to set up calibration points: we will do a mapping of the 3D model vertices onto the actual vertices they represent on the projection object. In our case, this object is the wall corner.
In the Splash GUI window, select the Cameras tab.
Press Ctrl + w to activate the wireframe mode. You should see the
edges and vertices of the 3D model, without any other image or video
displayed on it.
We will set six calibration points.
On your wall corner, identify six points corresponding to six vertices on the 3D model. These points are the target locations for the calibration points. You may mark these points with stickers or with a pencil. In our lab, we used blue, round stickers to mark the points; you can see them in the previous picture.
In the Splash GUI window, inside the Cameras tab, do each of the
following steps for the six vertices we’ve identified:
Select on the 3D model the vertex corresponding to one of the target location on the wall corner by left-clicking on it. If the vertex is located on an edge, you might need to rotate the 3D model to access it. To do this, either move your mouse around while clicking on the middle button; or active the trackpad while right-clicking and pressing the
Altbutton.A sphere surrounds the selected vertex, and a cross is displayed in the middle of the view. The cross acts as the target position for this vertex when calibrating.
To set up the calibration point for this vertex, we move the cross on the projection, i.e. on the physical wall corner so that its new location matches its target location. You can move the cross by pressing
Shiftand clicking anywhere in the 3D view. The cross will move to the cursor location. You can also move the cross with the arrow keys while pressingShiftorCtrlto make it move slower or faster, respectively.Place the cross on the physical, real wall corner, on the point corresponding to the selected vertex. Note that you can move the cross more precisely with the arrow keys.
You can see the mapping of one vertex to its target location in the following video:
On a close-up of the mesh, a vertex is selected. The corresponding cross is moved to the target location on the wall corner.#
You can delete a selected vertex by pressing Ctrl while
left-clicking on it.
You can also re-select a previously set vertex to update it.
Once you have completed these steps for six vertices, you are ready to calibrate.
In our demo, the end result looks like this:
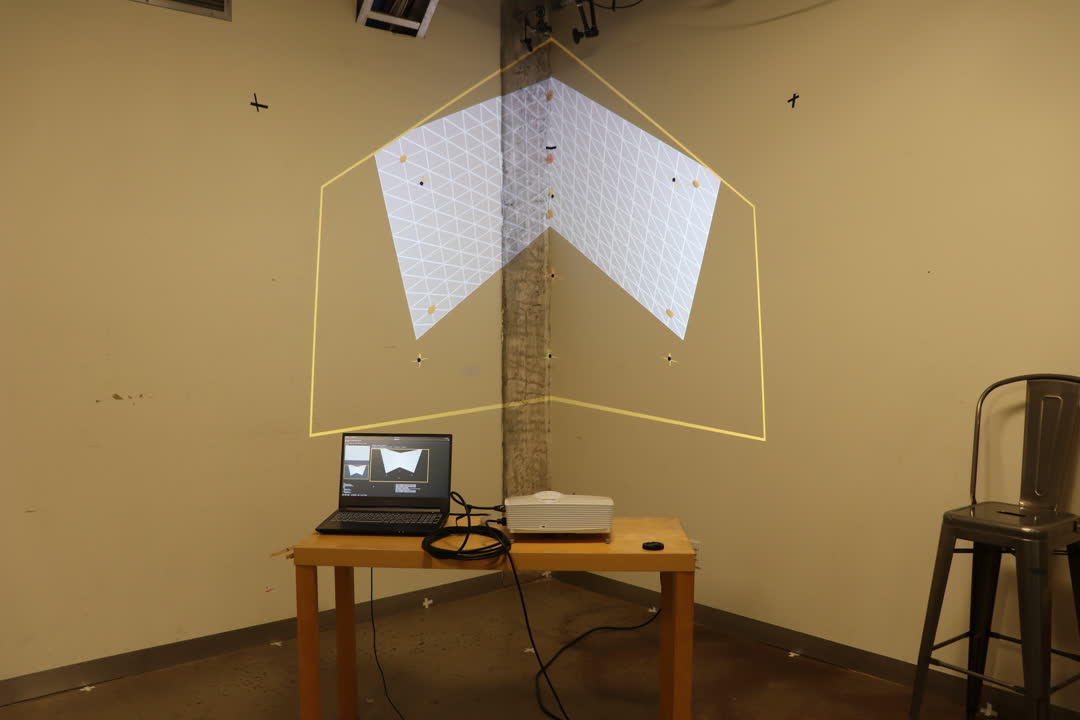
There are six vertex selected, and the cross associated with them are displayed on their target location, on the wall corner.#
Calibration time!#
Still in the Splash GUI window in the Cameras tab, press the
Calibrate camera button. Another way to do this is to hover on the
3D view while pressing c.
Splash will calibrate the content of the projection window to the previously defined vertices.
The wireframe model should now be aligned with the projection wall corner.
If that is not the case, you might want to review the locations of the calibration points.
This picture of the end result demonstrate the end result of the calibration:
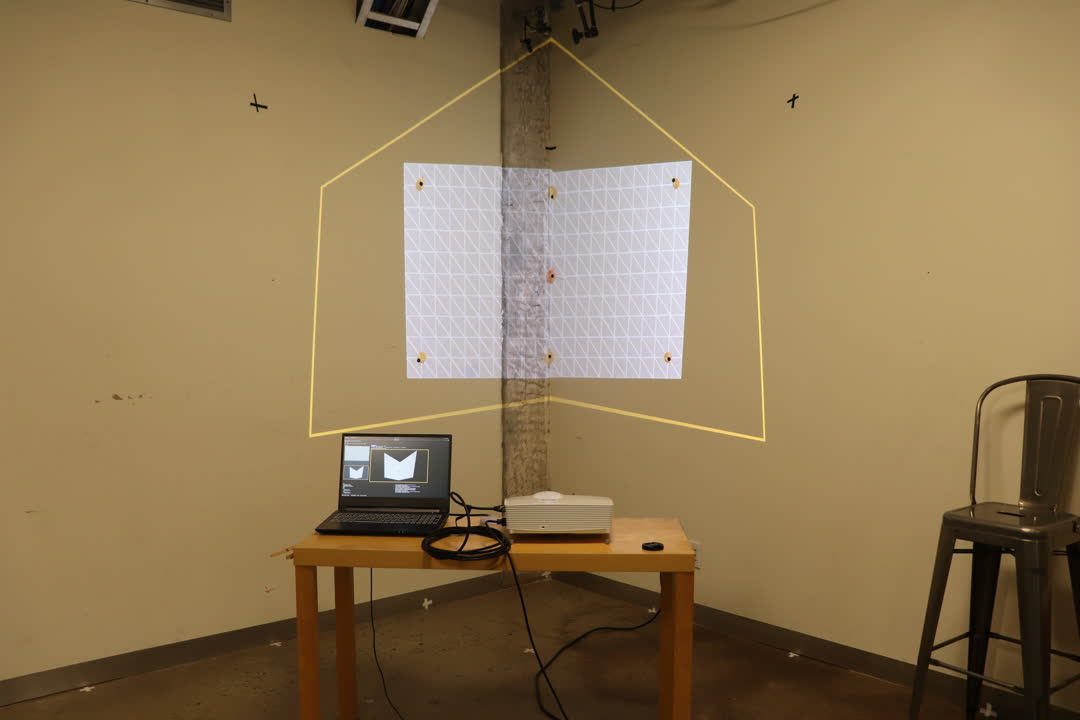
The 3D model is now adjusted in a way that the vertex are mapped to their target location on the wall corner.#
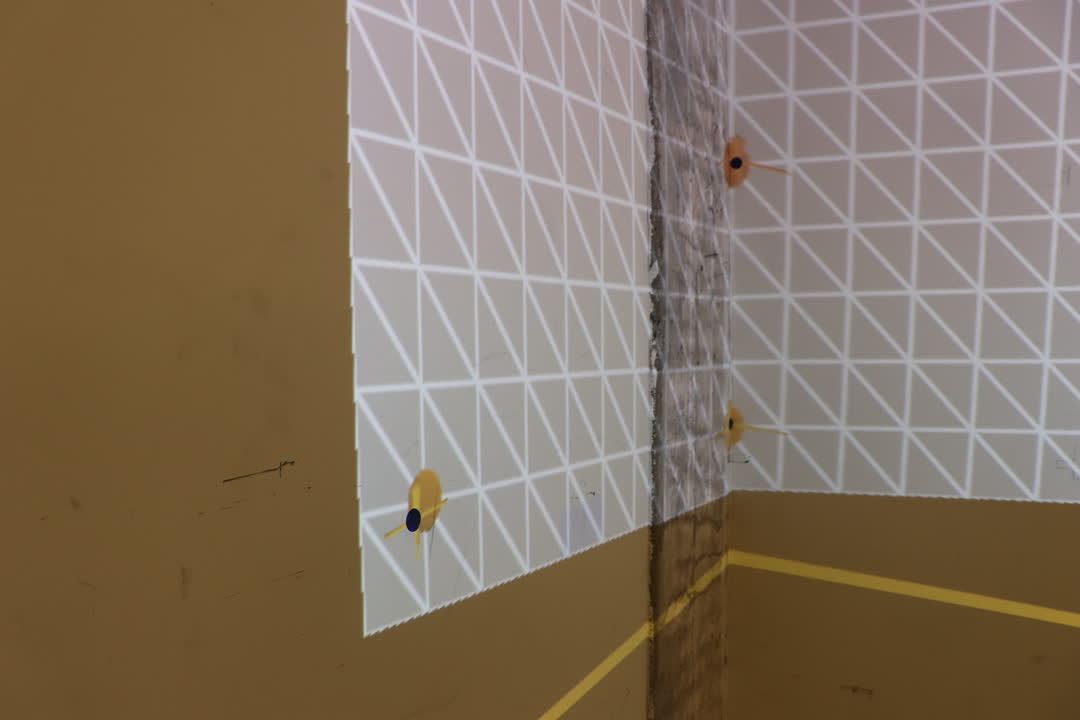
Close up of one of the vertex located where the target cross was moved, ie on the wall, where the sticker is.#
Add a video to be displayed#
We are ready to add a video to be displayed onto the projection wall corner.
You can find a Creative Commons licensed video in the Gitlab repo if you need one.
Still in Splash, go to the Medias tabulation. There is a list of the
inputs of the configuration and you can modify them. Select the only
object in the list, then change its type from image to video.
Next, update the file attribute with the full path to the video file
you want to display.
You should see the video playing onto the wall corner, according to the UV coordinates created in the 3D model.