Shape placement example#
This example shows an alternative use of Splash, sideways from its original target usage and closer to what can be found in most single projector video-mapping softwares. The idea is to place polygons on a real object directly on the projection, which implies that there is no need to create a precise 3D model of the objets. The downside is that this approach can not handle automatic blending when using multiple projectors. The workflow is as follows:
place the video-projector so that all the target objects are inside its cone of projection,
export from Blender a configuration file,
open the file in Splash,
use Blender to create and update polygons in Splash in real-time,
adapt the UV mapping of these polygons to match the selected video.
To do this this tutorial, you will need:
Splash installed on a computer
a video-projector connected to the computer
any projection surface, really

The target#
To be able to follow this guide, you need to install the shmdata addon for Blender: see Blender addons to install it.
Create and export a configuration file from Blender#
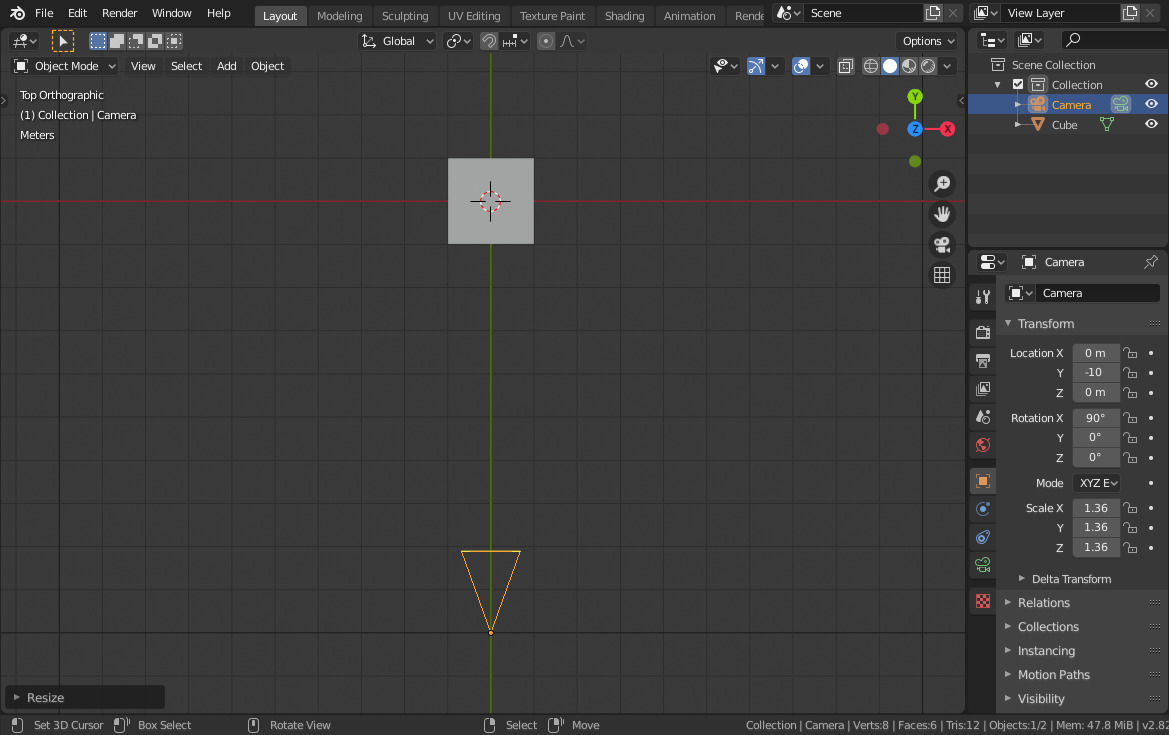
Let’s say that placing the video-projector is up to the user, and start with the export from Blender. Our goal here is to create a very simple scene which will roughly match the real installation. Once Blender is started, you can delete the light from the default startup scene. Place the camera along the Y axis and make of look toward this same axis. You should get a scene looking like this, from a top-down view:
Complex scene setup#
For this example to work, Blender needs to be able to send the mesh of the edited object in real-time to Splash, which in turn will update its display. This is done through the Blender Splash addon, which is able to output one or more meshes through shared memory. The setup is not as complicated as it may seem, as it is mostly a few paths to specify for the exporter to configure everything. First we will make it so Blender outputs the mesh:
select the cube in Blender (if you deleted it from an automated behavior like I do sometimes, recreate it),
go to the
Shmdata propertiessection of theObject propertiespanelclick on
Send mesh.
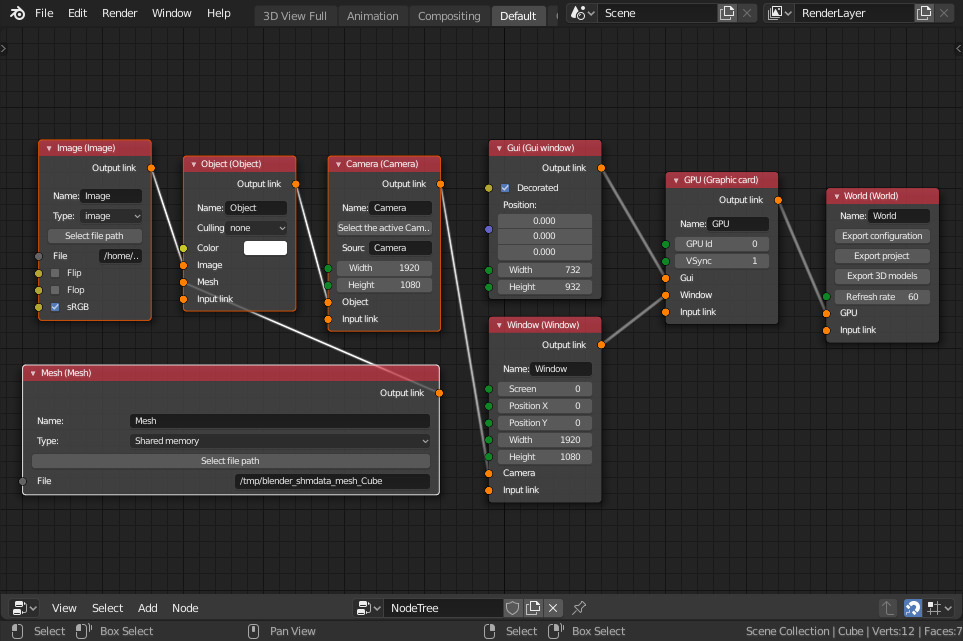
Now we need to create the Splash configuration. We consider that the video-projector is the second screen of the computer, and that both the computer screen and the video-projector have a resolution of 1920x1080. Inside the Blender node editor, create a Splash node tree which looks as follows:
Splash node tree#
The main difference with the previous example here is that instead of setting the Mesh node to use a Blender object as a source for its data, with set its ‘Type’ parameter to ‘Shared memory’ and, through the ‘Select file path’ button, go find the shared memory socket which should be in ‘/tmp/blender_shmdata_mesh_Cube’.
Click on ‘Export tree’ from the World node to export all the nodes connected to it, and call the output file ‘configuration.json’
Load the configuration in Splash#
This part is really easy. Either drop the newly created configuration file on the Splash window, or load it from the command line:
splash configuration.json
Two windows will appear, one borderless (and fullscreen if set correctly) and another one which will show the GUI when pressing Ctrl + Tab. The most useful command in Splash in this case it the switch from Wireframe to Textured, either using the keyboard shortcuts (Ctrl + W and Ctrl + T) or from the GUI.
Update the polygons and their texture coordinates from Blender#
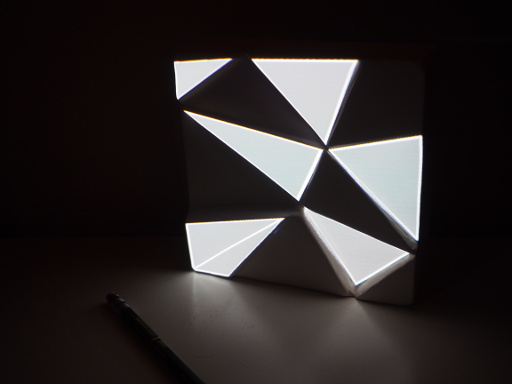
Here is the decisive moment. Back in Blender, select the cube and enter Edit mode (press Tab). From there, any modification to the mesh will show up immediately in Splash. The idea here is to place the polygons so that they match the geometry of the objects projected onto, like this:
The polygons#
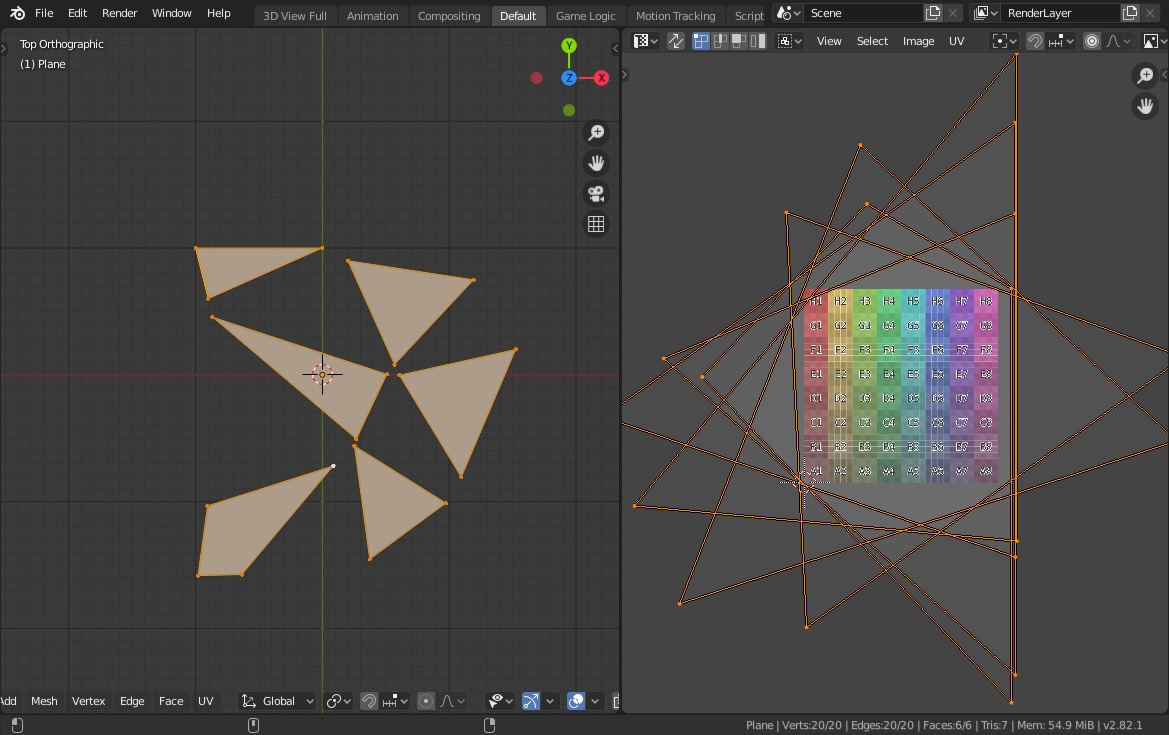
Once the polygons are in place, we have to create the texture coordinates, the easy way being by selecting all the vertices, pressing ‘U’ and chosing “Unwrap”. The result will show up immediately in Splash, and can be tuned to better match the input video.
Blender polygons#
With a very simple video of concentric light circle, you can obtain something like this:
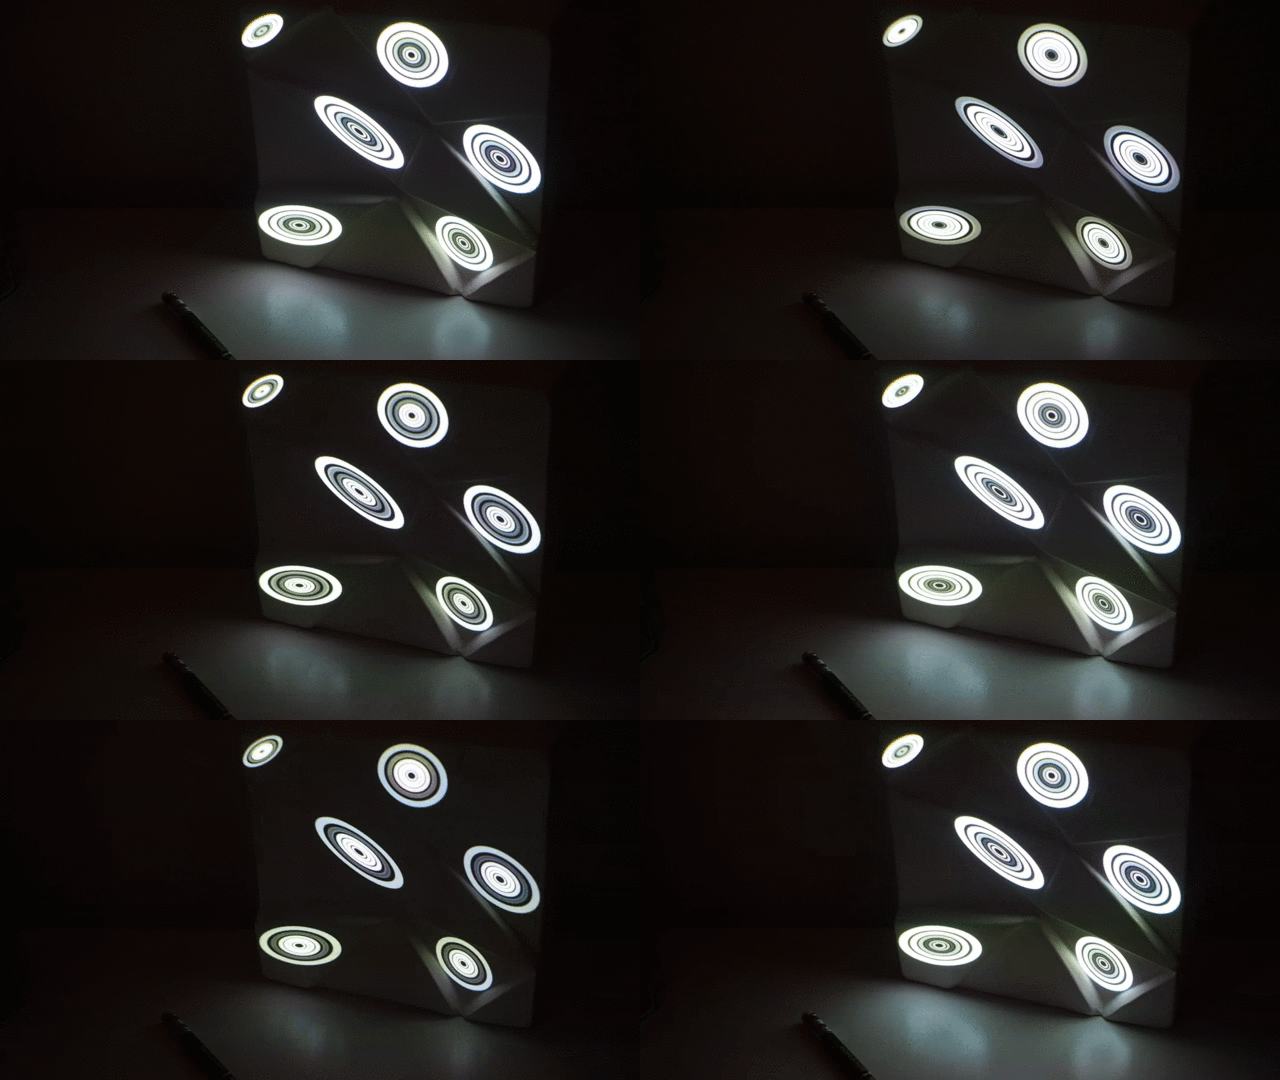
CIRCLES!#
Once again, the Blender community has excellent resources regarding modeling in Blender, to help you with the creation of the polygons and even of the videos to project!